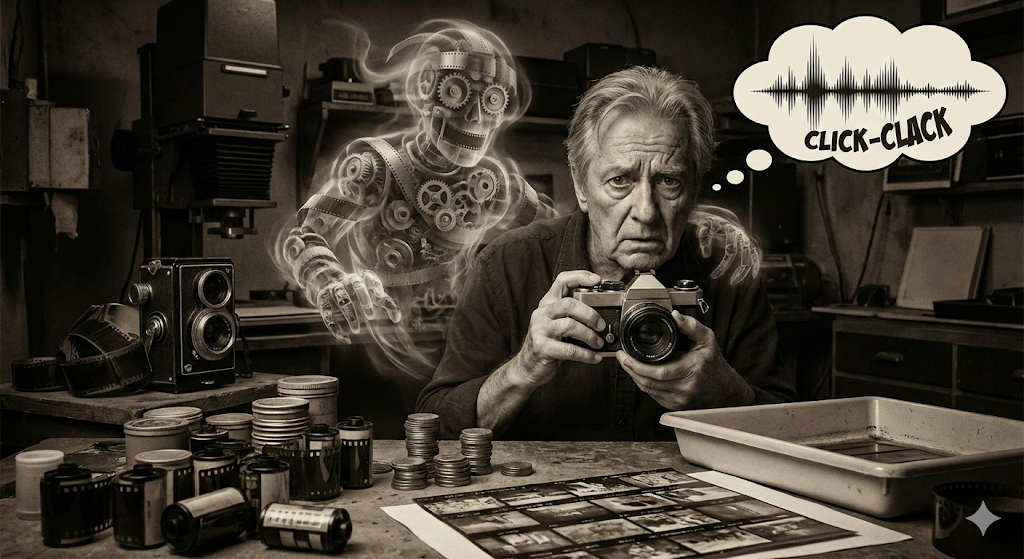
There is a ghost sound that haunts old-school photographers, and even new ones who learned from them. It’s a mental “click-clack” that rings in the back of their brain every time they press the shutter.
In the era of analog film, that sound had a very real price: 25 cents per negative, plus the cost of chemical developing, plus the cost of the contact sheet, plus scanning time.
That cost created something dangerous in the creative mind: Fear.
Fear made you hesitate at the critical moment. “Is it worth wasting a shot on this?” “What if it doesn’t come out right?” “Better save the last 3 shots of the roll for when the bride comes out, just in case I run out of film.”
The problem is that, although today we shoot with memory cards that can store thousands of images and batteries that last for days, many photographers are still operating with that “Analog Mental Software.”
They treat their state-of-the-art digital camera like a glorified film camera. They are afraid to shoot too much (“so I don’t fill the disk”), afraid to raise the ISO (“because of grain”), afraid to delete in-camera (“just in case”).
If you want to amortize your gear and compete in the current market, you have to format your brain before you format your card. Digital photography is not just a change of medium (from film to silicon); it is a radical change in economic and creative philosophy.
Below is the deprogramming manual to start shooting like a true digital native.
1. The Economy of the Shot: Zero Marginal Cost
The most brutal and disruptive advantage of digital is not resolution, it is economics: The marginal cost of shooting one more photo is ZERO.
Once you have bought the camera and the memory card, photo number 1 and photo number 10,000 cost exactly the same: nothing. This means that experimentation no longer has a financial penalty. Failure is free.
From “The Decisive Moment” to “Rapid Iteration” Henri Cartier-Bresson spoke of the “decisive moment,” waiting patiently for everything to align. That was necessary when you had 36 exposures. Today, the winning strategy is different. Scott Kelby calls it “shooting recklessly,” but we will call it “Rapid Iteration.”
Just like tech startups launch quick versions of their product to see what works, you must iterate your framing in seconds:
- Don’t take one photo of the flower. Take 20.
- Change the angle 10 degrees to the right. Shoot.
- Lower the exposure by one stop. Shoot.
- Raise the ISO to freeze movement. Shoot.
- Lie on the ground. Shoot.
If 19 of those 20 photos are bad, it doesn’t matter. No one will see them. But number 20 could be the masterpiece you would never have discovered if you had been afraid of “wasting film.” In digital, quantity is the shortest path to quality.
2. The Monitor of Truth: Your LCD Screen is Not a TV
Many photographers use the rear camera screen (LCD) to feed their ego. They take the photo, look at it for 2 seconds, say “Wow, what colors, what a shot!” and keep walking. They get home, open it on their calibrated 27-inch monitor, and discover absolute horror: The focus is on the ear, not the eye. Or worse, there is imperceptible camera shake that has left the entire image soft.
On a bright, compressed 3-inch screen, everything looks sharp and perfect. That screen is a pathological liar designed to sell you the camera, not to show you reality.
The Forensic Verification Protocol: The LCD screen is not for admiring your art; it is for auditing your mistakes.
- Shoot.
- Immediately press the Zoom (Magnify) button to 100%. (Many professional cameras allow configuring the center joystick button to do this in one touch).
- Navigate directly to the subject’s eye or the point of interest.
- Is it sharp as laser-cut glass?
- YES: Keep shooting.
- NO: Retake the photo immediately.
If you don’t verify at 100% in the field, you are playing the lottery with your results. And the house always wins.
3. The “Police Lights”: The Highlight Alert
Have you seen those blinking black and white areas (“zebras”) when you review a photo on the camera? Many rookies disable them in the menu because “they are annoying to see the photo.” Those lights (called Blinkies or Highlight Alert) are your Check Engine light. They are screaming at you that you have destroyed the image information.
In the digital world, if you burn the whites (extreme overexposure), there is no recoverable data. It is pure white (255, 255, 255). It cannot be recovered in Photoshop, no matter how much you lower the “Highlights” in Lightroom. You will only get a flat, ugly gray. If the bride’s forehead or the details of the white dress are blinking, that photo is technical trash.
The Discipline of Exposure: Keep alerts on always. If you see blinking in a critical area (skin, textured clouds, detailed clothing):
- Use exposure compensation (-0.3 or -0.7 EV).
- Shoot again.
- Verify that the blinking has disappeared. It is your only real life insurance against irreversible overexposure.
4. The Chameleon Superpower: Variable ISO
In the old film days, ISO was a sentence. If you had an ISO 100 roll loaded for outdoors and suddenly entered a dark church, you were dead. You had to rewind the roll (losing photos), open the camera, find an ISO 800 roll, and load it. It was slow, expensive, and painful.
Today, you have the superpower to adapt to light in fractions of a second, frame by frame.
- You are in the sun: ISO 100.
- You enter a tunnel or indoors: ISO 3200.
- You go out into the shade: ISO 400.
The Irrational Fear of Noise: Many photographers are still anchored in the fear of digital “noise” from cameras of 15 years ago. “Oh no, if I go over 800 it will look grainy!” Listen to this and burn it into your brain: A noisy photo is usable, correctable, and even aesthetic (looks like film grain). A blurry or shaken photo is garbage. Modern cameras handle extremely high ISOs (6400, 12800) with amazing quality. Do not sacrifice shutter speed for fear of ISO. Use it freely; that’s why you paid thousands of dollars for that advanced sensor.
5. Digital Hygiene: Memory Card Management
There is a temptation to buy a monstrous memory card (256GB or 512GB) so you never have to change during a wedding or a long trip. “That way I don’t worry,” you think.
This is a High-Risk Strategy. It is putting all your eggs in one very fragile basket. If that single card fails (and cards fail, get corrupted, or get lost), 100% of the event is lost. You face lawsuits, refunds, and complete reputational ruin.
The Fragmentation Strategy: Use medium capacity cards (32GB or 64GB) and swap them strategically during the event.
- If one card dies, you only lose a part of the day (maybe the cocktail hour, but you have the ceremony safe on another card stored in your pocket).
The Professional’s Physical Trick: When a card is full, store it in the case upside down (with contacts facing up or label facing back). It is an infallible visual binary system:
- Face up (Label visible) = Empty, ready to use.
- Face down (Contacts visible) = Full, DO NOT TOUCH UNDER ANY CIRCUMSTANCES.
6. Hot Editing: The Art of Taking Out the Trash
Why bring home 2,000 photos if you know, deep in your heart, that 500 are bad? Professionals take advantage of “dead time” (taxi rides, airport waits, lunch breaks) to do a preliminary cleaning in-camera.
- Did you accidentally take a black photo? Delete.
- Did someone blink? Delete.
- That light test that came out blown out? Delete.
The Psychological Effect: When you finally download the cards to the computer, you don’t face a mountain of digital trash that depresses you. You face an already curated selection. Your perception of your own talent improves (“Wow, almost all of them are good!”) and your hard drive thanks you. Plus, you free up space on cards to keep shooting if the day runs unexpectedly long.
7. Exposure: The Right to the Right (ETTR)
There is an eternal technical debate: Is it better for the photo to come out a little dark (underexposed) or a little bright (overexposed)? In digital, the answer is counterintuitive for those coming from slide film (where you had to underexpose). The correct answer today is: Expose to the Right (without burning).
The digital sensor captures much more tonal information in bright areas than in shadows. “Noise” hides in the darkness.
- If you take a dark photo and try to lighten it in post-production, noise explodes in the shadows like an ant infestation.
- If you take a bright photo (without burning, remember the blinkies) and darken it on the computer, you get rich colors, clean shadows, and zero noise. Push the histogram to the right, grazing the limit, but not touching it. It is pure signal management technique.
8. The Outsourced Lab: Don’t Be a Printer
Don’t fall into the trap of wanting to do it all yourself. It is the “One-Man Band” syndrome. Many photographers buy large format printers (“plotters”) from Epson or Canon thinking they will save money printing their own enlargements. They end up spending thousands of dollars on inks that dry out from lack of use, print heads that clog, color profiles that don’t match, and expensive paper that ends up in the trash.
Your business is capturing images, not managing a print shop. Use professional online or local labs. You send the calibrated file, pay a fair fee, and receive a museum-quality print in a rigid tube right at your door. It is a scalable model, maintenance-free, and quality guaranteed. Delegate what is not your core business to focus on what actually makes money: taking photos.
The Paradox of Digital Freedom: Volume Will Drown You
If you apply these 8 principles religiously, you will become an extremely efficient visual production machine. You will shoot more, risk more, iterate faster, and get better technical results.
But this freedom has a hidden and dangerous price: Management Volume.
In the analog era, you managed 200 photos per event and delivered a physical album months later. Now you manage 3,000 RAW files per wedding. You have SD cards, CFexpress cards, working SSD drives, backup drives, cloud copies, Lightroom catalogs, high and low-resolution exports, and online delivery galleries.
The logistical complexity of your business has multiplied by a thousand. It is humanly impossible to remember every step from memory without making fatal errors.
- “Did I format the card before leaving or does it have photos from the previous session?”
- “Did I charge the spare batteries or are they dead in the backpack?”
- “Did I back up from disk A to disk B or did I just think about it?”
- “Did I upload the RAWs to the cloud?”
- “Did I send the final invoice to the client?”
A single oversight in this chain can mean the loss of irreplaceable data or the loss of a client’s trust forever.
Airline pilots, with thousands of flight hours, do not trust their memory to take off. They use a Checklist. Surgeons do not trust their memory before opening a patient. They use a Checklist. Why do you, who guard the most important memories of your clients’ lives, allow yourself the luxury of trusting your distracted head?
You need a centralized system that forces you to be orderly, not by will, but by protocol. It is time to stop improvising and start operating with surgical precision.
The definitive pre-production and post-production checklist integrated into your task manager.
You don’t need magic automation software or robots; you need applied visual discipline. With the native functions of GGyess WorkSuite (Tasks, Subtasks, and Storage), you can build this unbreakable safety protocol. Here is how you turn digital chaos into an infallible system:
PHASE 1: The Master Task (Your Safety Container) Instead of having post-its stuck to the monitor that fall off and get lost, create a task on your Kanban board in WorkSuite for each session (e.g., “Laura and Marcos Wedding Session”). This task is your command center. It is not just a reminder; it is the container for the entire operation. Inside it, you use the Subtasks function to create your flight checklist.
PHASE 2: Pre-Production Checklist (Departure Protocol) This checklist is verified on the mobile app 24 hours before leaving home. Create these subtasks in GGyess:
[ ]Power: Charge all batteries to 100% (Bodies A and B + Flash).[ ]Memory: Format cards in-camera (verify they are empty).[ ]Cleaning: Verify sensor is clean (test shot at sky f/22).[ ]Logistics: Event address confirmed on Google Maps.[ ]Legal: Signed contract attached in the Files section of the task.
By checking off each subtask with a click, your brain releases anxiety. You know you haven’t forgotten anything. You are ready for takeoff.
PHASE 3: Post-Production Protocol (The Safe Landing) When you return from the session, tired and hungry, is when mistakes are made. Don’t throw the backpack just anywhere. You move the card on your GGyess Kanban board to the “In Process” column and attack the next list of mandatory subtasks:
[ ]Ingest: Download cards to Local Hard Drive.[ ]Security: Immediate backup to External Drive.[ ]Cloud: Upload selection of best RAWs to GGyess Storage module (Remote Backup).[ ]Culling: Photo selection completed.[ ]Editing: Retouching finalized.
PHASE 4: Closing and Monetizing Once you have checked all subtasks and files are safe, you take the final step. Without leaving GGyess, you go to the SocialSuite module and schedule the best photos from that session to go out on Instagram next week, tagging the client.
Conclusion:
Digital photography gives you infinite freedom to shoot, but that freedom comes with an administrative burden that can drown you.
Use your camera like a professional (histograms, variable ISO, deleting) and manage your business with a real system (Kanban, subtasks, and centralized files). Talent makes the photo; the checklist ensures you deliver it and get paid.