You’ve surely been there: you’re walking through a park, you see a spectacular flower, you pull out your camera (or high-end mobile), shoot, and think: “That’s it, I have a work of art.”
Flowers seem like the perfect subject. They don’t complain, they don’t blink, they don’t ask you to remove their double chin in Photoshop, and they are full of vibrant colors by default. It should be easy, right?
Reality hits you when you get home and see the photo on your monitor.
It’s… boring. It’s flat. It lacks life. It looks more like a photo from a 1980s botany catalog than that artistic, ethereal image you had in your head.
Scott Kelby, one of the world’s leading authorities on photography education, begins his lessons on flowers with a cruel but revealing joke. He usually talks about a technical problem called “reflective pollination,” which creates an invisible gray layer over flowers, and mentions a magic filter (the Flora 61B) that fixes everything.
Of course, the filter doesn’t exist. He made it up.
But the lesson is very real: Photographing flowers is deceptively difficult. It requires specific technical mastery that separates the tourist with a camera from the true visual artist. If you want your floral images to go from “pretty” to “spectacular,” you need to stop relying on luck and start manipulating your reality with specific tools and techniques.
Below, we break down the “Bible of Floral Photography” into 7 technical commandments.
1. The Cardinal Sin: The “Giant” Perspective
The number one mistake that 99% of photographers make has nothing to do with the camera, the lens, or the light. It has to do with laziness.
When you walk through a garden, you view flowers from your natural height (5’3″ – 6’0″). If you shoot from there, pointing down, you are showing the viewer exactly the same thing they see every day. There is no surprise. There is no drama. It is what Kelby calls a photo that is “mediocre by design.”
The Rule of Pain To get an impactful photo, you have to radically change the perspective.
- Don’t shoot from above.
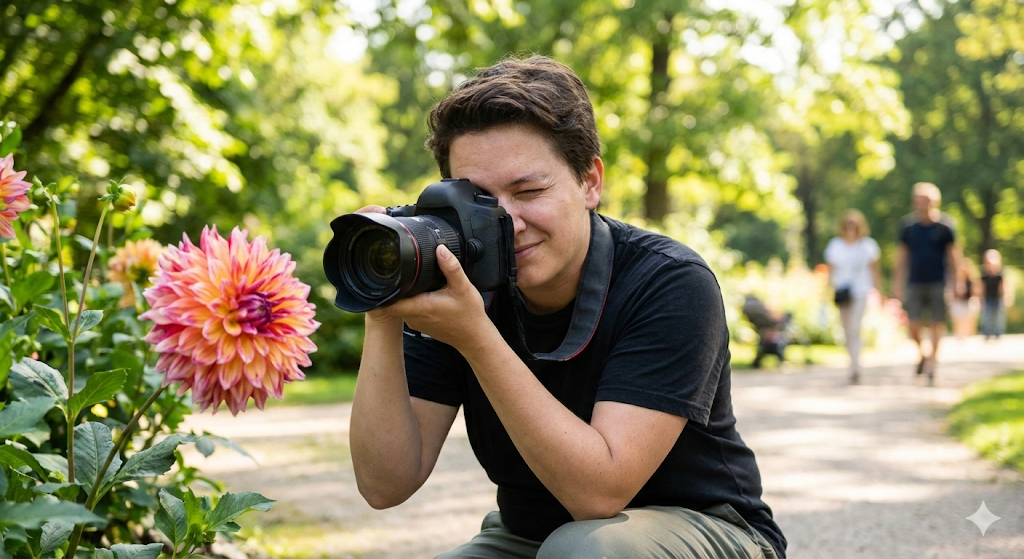
- Get down to ground level.
You have to put the lens at the same height as the flower, or even lower, shooting toward the sky. By doing this, the flower ceases to be a dot on the ground and becomes a majestic architectural structure rising toward the light.
The Secret Gear: This implies kneeling or lying in the mud. The professional accessory no one tells you to buy? It’s not a filter; it’s gardener’s knee pads. Go to Home Depot or your local hardware store. If you don’t end the session with dirty pants, you probably didn’t do it right.
2. The Optics: Zoom or Macro? (And How to Save $500)
There is a myth that you need a dedicated Macro lens (those expensive lenses that allow 1:1 reproduction) to take good flower photos. While a macro is ideal for capturing the veins of a petal or the texture of pollen, it is not mandatory to start.
The Telephoto Strategy A good Zoom lens (like a 70-200mm) is a lethal weapon for flowers if you know how to use it:
- Move physically back: Use the zoom to the max.
- Wide Aperture: Set your camera to “Aperture Priority” and use the lowest f-number you have (f/4 or f/5.6).
- Compression: By zooming in, you “compress” the background, making it look larger and more out of focus. This isolates the flower and creates that creamy, artistic background we all love.
The Cheap Macro Hack What if you want to get super close but don’t have $600 for a new macro lens? Professionals use Close-up filters. These are thick glass filters (diopters) that screw onto the front of your current lens, acting like a high-quality magnifying glass.
- Pro Tip: Look for the Canon 500D (yes, it works on Nikon and Sony too if the diameter matches).
- The Advantage: It costs a fraction of the price, weighs nothing in your bag, and turns your standard lens into a field microscope.
3. Controlling the Weather: Be Your Own Rain God
Have you ever noticed how flower photos after a storm have a special melancholy and saturation? Water droplets act like little jewels, lenses within the lens reflecting the world. The amateur waits for it to rain. The professional manufactures the rain.
This is perhaps the cheapest and most effective trick in the book:
- Go to a drugstore or supermarket (Walgreens, etc.).
- Buy a small spray bottle.
- Fill it with tap water.
- When you find the perfect flower, spray it a couple of times. You will instantly have those fresh, sparkling drops without wetting your gear or waiting for the weather. (Bonus: Kelby mentions that this same spray bottle works to remove wrinkles from your clothes if you travel a lot).
4. The Light: Why the Sun Is Your Enemy
Instinctively, we think a bright sunny day is perfect for photography. Mistake. For flowers, direct midday sun is death. It creates harsh shadows, impossible contrasts, and “burns out” the subtle colors of the petals.
The Three Ideal Scenarios:
- Cloudy Days: Clouds act like a giant million-dollar softbox. The light is soft, diffuse, and enveloping. Colors saturate naturally.
- Window Light (Indoors): If you buy flowers (we’ll talk about this later), put them next to a window that does NOT get direct sun. If the window is dirty, even better (more diffusion).
- The Shower Curtain: If you have to shoot in direct sun, go to a home goods store and buy a translucent white shower curtain. Use it to block the sun over the flower. You just created a professional diffuser for less than 10 dollars.
5. The Portable Studio: Black and White Backgrounds
Sometimes you find the perfect flower, but the background is a disaster of dead branches, parked cars, or trash. A sharp photo with a chaotic background is a bad photo. Professionals bring the studio to the field.
The Jacket Trick (Black Background) To achieve those dramatic photos of a flower floating in total darkness (“Fine Art” style), you don’t need Photoshop.
- Ask a friend to stand behind the flower holding a black jacket or a piece of black velvet fabric.
- Make sure the flower is in the sun (or lit) and the jacket is in shadow.
- The camera will expose for the flower, making the black background disappear into pure darkness.
The Cardstock Trick (White Background) For a more commercial or botanical look (“Apple” style), use a white piece of poster board/cardstock behind the flower. If you use a second board to reflect light, you have a complete product studio on your kitchen table.
6. Taming the Wind: The Battle Against Movement
Wind is the archenemy of macro photography. When you are magnifying an image, a breeze imperceptible to you is a hurricane to the camera. A millimeter of movement and the photo comes out blurry.
You have two combat strategies:
- Brute Force (Freeze): Switch your camera to Shutter Priority (S or Tv) and force a speed of 1/250 of a second or faster. This will freeze the flower’s tremor.
- Zen Philosophy (Flow): If you can’t beat the wind, join it. Lower the speed to 1/15 of a second and let the flower move, creating a painterly, silky effect of intentional movement.
7. The Final Secret: Don’t Search, Buy
Sometimes, nature is imperfect. Insects eat the petals, the sun burns the leaves. Kelby’s “stupid but brilliant” advice is: Go to the florist.
For 10 dollars you can buy perfect, genetically selected specimens, without spots or bites. You can take them home, control the light, control the wind (by closing the window), use your tripod calmly, and spray your fake water. 90% of the award-winning flower photos you see were not taken on a windy mountain; they were taken on a controlled kitchen table.
The Hidden Lesson: Specialization Is Everything
If you analyze the seven points above, you will see a clear pattern that separates the amateur from the professional.
The amateur tries to do everything with generic tools:
- Uses their normal height instead of getting low.
- Uses existing sun instead of diffusing it.
- Uses the existing background instead of placing a black one.
The professional, on the other hand, understands that for a specific result, they need a specific tool.
- Uses a spray bottle for water.
- Uses cardstock for the background.
- Uses a close-up filter for detail.
- Uses knee pads for perspective.
They understand that you can’t use a hammer to screw in a lightbulb, nor a wrench to cut a stem. Technical excellence is born of specialization.
However, here is where the great contradiction of the modern photographer arises.
You invest thousands of dollars in specialized lenses. You fill your bag with specific “gadgets” for every lighting situation. You obsess over having the perfect tool for the capture.
But when you get home, download the photos, and sit down to manage your business… suddenly, you settle for the generic.
You try to manage a complex visual workflow, with 50MB RAW files, client revisions, critical deadlines, and multiple post-production stages using tools like Trello, Notion, or Excel.
Don’t get me wrong. Trello is fantastic… for programmers. Excel is brilliant… for accountants. They are generalist tools. They are the equivalent of trying to do macro photography with a wide-angle lens: possible, yes, but painful, inefficient, and with mediocre results.
A photographer doesn’t manage “text tasks”; they manage images. A photographer doesn’t just need a “To-Do” list; they need to know what editing stage a session is in, they need to preview the file, they need client approval, and they need to automate publishing.
If your photography requires specialized gear in the field, your management requires specialized gear in the office.
It’s time to stop using tools designed for software engineers and start using a system designed for the visual brain. It’s time to understand…
Why Trello Is Not Enough for Photographers: The Power of GGyess WorkSuite.
The “Macro Lens” of Your Business Just as the macro lens allows you to see details others ignore, GGyess WorkSuite allows you to see the real state of your photography business.
- From Hard Drive to Cloud (Frictionless): Kelby taught us to control the environment. GGyess allows you to control your files. Its storage module is not a generic Google Drive; it is integrated into your workflow. You upload session files directly to the corresponding task. No more “where did I put that folder?”.
- The Visual “Kanban”: Imagine a Kanban board (To Do -> In Editing -> Ready for Delivery) but designed for creatives. You can move your projects visually through the stages. You know exactly which photos remain to be edited and which are ready to go out.
- Automated Publishing (The “Remote Shutter” for Your Socials): It is useless to have the perfect photo if you forget to publish it at the time your audience is online. GGyess integrates social media publishing within the same flow.
Conclusion
Scott Kelby’s lesson on flowers transcends botany. It teaches us that intentionality and the right tools are the only path to excellence.
Don’t settle for the light falling from the sky; modify it. Don’t settle for the background that exists; change it. And please, don’t settle for generic management tools that were made to organize code or inventory.
Your art deserves a specialized ecosystem. Your workflow deserves to move from the chaos of sticky notes to the visual order of a professional suite. Give your business the same sharpness you give your photos.