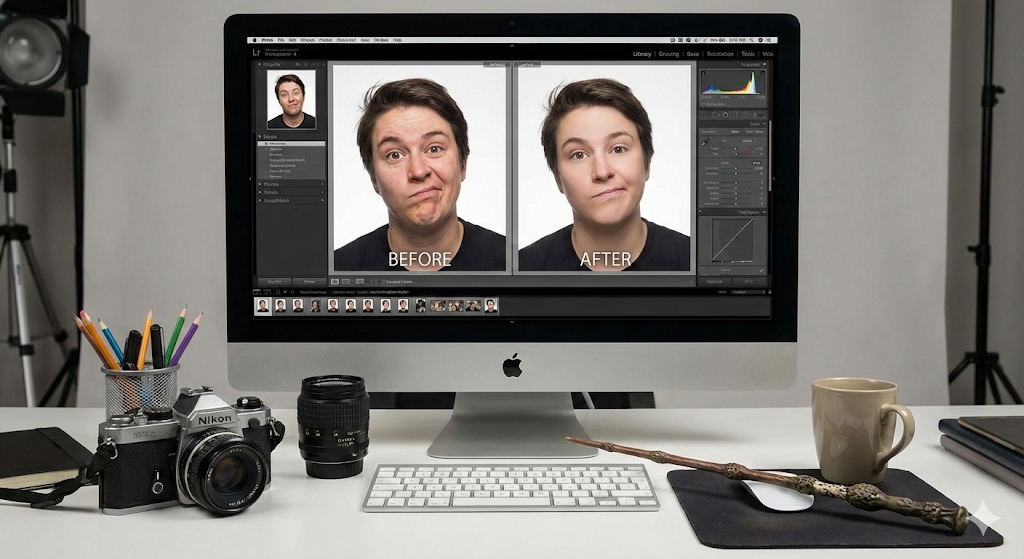
The title of this lesson is, let’s admit it, a bit misleading. It promises to teach you how to make people look “better.” But let’s be brutally honest: if the person has been touched by the magic wand of ugliness, there is no digital camera, lens, or Photoshop plugin (yet) that will magically transform them into Matthew McConaughey or Jessica Biel.
The camera captures photons, it doesn’t perform plastic surgery.
However, as photographers, we have an almost sacred duty: to make them look better in the photo than they look in the mirror.
Scott Kelby, with his characteristic humor, reminds us of a fundamental truth: a bad photographer can make a supermodel look like a troll, and a good photographer can make your neighbor look like an interesting character actor. A good portrait isn’t just capturing a face; it is sculpting with light, optics, and psychology.
If your portraits look like mugshots or driver’s license photos, it’s because you are ignoring the rules of optical physics. Below is the operational manual for achieving portraits that your clients will want to frame (and not burn).
1. The Optics of Beauty: The Power of the Telephoto
What is the number one mistake amateurs make when trying to shoot a portrait? They get too close. And they do it with a wide-angle lens (a mobile phone or an 18-55mm at its widest setting).
The result is the dreaded “Clown Nose Effect.”
Wide-angle lenses distort whatever is closest to the camera. If you get close to the face, the nose looks giant, the ears disappear backward, and the head deforms like a balloon. No one, absolutely no one, looks good like this.
The 85-100mm Rule
To get flattering portraits that slim the face and align features, you need to compress the perspective. This is achieved with a short telephoto lens.
- If you have a standard zoom (like a 24-120mm or 70-200mm), crank it to 85mm or 100mm.
- Physically step back from the subject (10 to 12 feet).
By stepping back and zooming in, you aesthetically flatten the features. The nose returns to its natural proportion and the ears go back to their place. Plus, it gives you “breathing room” to work without invading the model’s intimate bubble, which helps them relax.
2. Aperture: Sharpness vs. Art
All photographers go through a phase of obsession with “Bokeh” (that creamy, blurry background). They buy f/1.4 lenses and shoot everything wide open.
It’s artistic, yes. But Kelby drops a bomb for commercial portraiture: f/11 is king.
Why close down the aperture?
When doing a classic portrait, you want the entire face to be in focus. From the tip of the nose to the ears.
If you shoot at f/1.8 and the subject turns their head slightly, you will have one sharp eye and one blurry one. You will have a focused nose and ears lost in the fog. At f/11, you capture the real texture of the skin, the sharpness of the eyelashes, and the full expression. Sharpness conveys professionalism and reality. (Note: If you are outdoors and the background is a dumpster, break this rule. Drop to f/2.8 or f/4 to wipe the background off the map. But if you control the background, aim for sharpness).
3. The Background: The Silent Killer
The background is what separates a snapshot from a professional portrait. A light pole growing out of the subject’s head or a bright red car driving by in the back ruins the best smile.
The human eye is fickle. It will always look first at the brightest and most contrasted area of the image. If the background is brighter or more chaotic than the face, you have lost the battle.
The Studio Strategy (Low Cost): You don’t need a studio in Manhattan. You need flat backgrounds.
- Paper: A roll of seamless paper is cheap and effective.
- Muslin: Fabrics with subtle textures (gray, brown, blue).
- White: Clean and modern, but requires a lot of light so it doesn’t look gray.
- Black: Dramatic and elegant. Requires a “rim light” to separate dark hair from the background.
The Outdoor Strategy: Seek absolute simplicity.
- Look for uniform textures (an out-of-focus brick wall, a distant green hedge).
- Make sure the background is darker than the subject’s face. This pushes visual attention toward the face.
4. The Focus: There is Only One Right Answer
In photography forums, there are endless debates about whether to focus on the tip of the nose, the cheekbone, or the forehead. Ignore them. They are noise.
Focus on the eyes. Always.
If the eyes aren’t sharp as glass, the portrait is dead. The eyes are the window of emotional connection. If the eyes are blurry, the viewer feels the photo is “out of focus,” even if the rest is perfect. (If the subject is in profile, focus on the eye closest to the camera).
5. Lighting: Shadow is Your Best Friend
Instinctively, we think a bright sunny day is perfect for going out to take photos. Fatal error. Direct midday sun is the portrait photographer’s worst enemy. It creates harsh, black shadows in the eye sockets (“raccoon eyes”), highlights every skin imperfection, and makes people squint and grimace in pain.
The Outdoor Solution: Find Open Shade Your mission is to find a place where the sun doesn’t hit directly.
- Under a leafy tree (watch out for dappled light spots).
- In the porch of a building.
- In the shadow of a tall building.
- Under a parasol.
The light in “open shade” is soft, wrapping, and tremendously flattering. Skin tones look creamy and eyes relax, allowing for a natural expression.
The Indoor Solution: North Window The best light in the world is free: Indirect Window Light. Place your subject next to a window that doesn’t receive direct sun (usually North-facing ones). Side light creates volume, modeling the face gently.
The $5 Hack: If harsh direct sun is coming through the window, go to the store and buy a translucent white shower curtain. Hang it up. You just turned that harsh light into a giant professional quality “Softbox.” The light will pass through soft and diffuse, perfect for portraits.
6. Kids and Babies: Get Down to Their Level
Photographing children from your adult height (5’7″ – 6’0″) is condescending and visually boring. They look big-headed, small, and distant.
Kneel down. Lie on the ground. Lower the camera to the exact level of their eyes. Enter their world. The connection is immediate and the child acquires a heroic presence in the image.
The Newborn Secret Newborn babies are not professional models. If they are awake, they usually look confused, cross-eyed, or are crying. The Kelby trick (learned from master David Ziser) is: Take advantage of when they sleep. Newborns sleep 18 hours a day. Don’t try to wake them up to “smile.” A sleeping baby conveys angelic peace.
- Dress the parents in black (turtleneck).
- Have them hold the baby.
- Zoom in tight.
- Capture the serenity of sleep. It’s the photo every mother wants.
7. Sunset Portraits: The Sky Trick
Everyone wants that epic photo with the incredible sunset in the background. The technical problem:
- If you expose for the face to look good, the sky blows out white.
- If you expose for the sunset to look red, the person becomes black (silhouette).
The Pro Recipe:
- Put the camera in Manual. Turn off the flash.
- Aim at the sky and adjust exposure so it looks dramatic and saturated.
- Keep that setting.
- Turn on the flash (in TTL or Manual mode).
- Shoot the subject.
The camera will capture the dark, rich sky thanks to your manual setting, but the burst of flash will illuminate the subject. You have the best of both worlds: a magazine sky and a well-lit subject.
8. The Secret of Gold and Silver: Reflectors
You don’t always need expensive lights with heavy batteries. Sometimes you just need to bounce the light that already exists. Buy a 5-in-1 Collapsible Reflector. They cost less than $40 and work miracles.
- Silver Side: Bounces a cool, bright light. Ideal for cloudy days where light is flat.
- Gold Side: Bounces a warm light. Ideal for sunsets or to give a tanned tone to the skin.
Most importantly: by bouncing light toward the face, you create a “Catchlight” (that little dot of white sparkle in the pupil). That sparkle is what makes the eyes look alive. Without it, eyes look like “shark eyes” (dead and dark).
The Paradox of the Successful Portraitist: The Curse of Waiting
If you follow these tips to the letter (long lens, open shade, focus on eyes, soft light), your portraits will take a quantum leap in quality. People will look beautiful. They will feel like movie stars. They will love you during the session.
And here begins your real problem as a professional.
When you make someone look amazing, that person wants to see the photo NOW. The excitement of the photoshoot has an extremely short half-life. It is radioactive.
- Day of the session: “So exciting! I felt amazing!” (Euphoria level: 100%).
- Day 2: “I wonder how they turned out? Surely they’ll send a sneak peek today.” (Level: 90%).
- Day 7: “Why haven’t they sent anything yet? Did I look bad?” (Level: 50% – Anxiety kicks in).
- Day 14: “This photographer is irresponsible. I already paid and they’ve vanished.” (Level: 10% – Anger kicks in).
- Day 30: “I look good in the photo they finally sent, but I hate the photographer and won’t recommend them.” (Level: 0%).
The portrait client is purely emotional. It is not a B2B company waiting 30 business days for an invoice. It is a mother waiting for photos of the baby who grows every day. It is a model waiting for photos for a casting tomorrow. It is a couple waiting for engagement photos to announce the wedding.
Every day of delay murders your reputation.
Many photographers are incredible artists but terrible managers. They accept 15 sessions in a month because they need the money. They promise delivery in a week. Work piles up. Memory cards fill up. They start ignoring client WhatsApps out of shame. Stress skyrockets. Editing quality drops due to rushing.
It is useless for the photo to be technically perfect (f/11, 85mm, soft light) if you deliver it when the emotion has already died. Or worse, when the client is already badmouthing you.
You need to see time with the same clarity and precision with which you see light. A “To-Do List” is useless because it doesn’t show you date overlap. You need a visual tool that tells you, mercilessly, when you are running out of time and where the bottleneck is.
It is time to stop guessing and start visualizing your immediate future.
Stop Missing Deadlines: Organize Your Due Dates with Gantt Charts.
1. The Map of Time (What is a Gantt for photographers?) A task list tells you what to do. A Gantt chart tells you when to do it and how long it will take. In GGyess WorkSuite, you can see your portrait projects displayed on a horizontal timeline. You don’t see text; you see colored bars. You visually see that the “Laura Wedding Editing” bar occupies Monday to Wednesday, and that the “Lucas Baby Session” bar overlaps dangerously on Tuesday and Wednesday. The visual conflict is impossible to ignore. Your brain detects the train wreck before it happens.
2. Reality Adjustment (Proactive Rescheduling) Upon seeing the chart, you realize it is physically impossible to deliver both sessions on Friday with quality. Instead of panicking Thursday night at 3 AM, you readjust the Gantt bars Monday morning.
- You drag the “Lucas” delivery to the following Monday.
- You notify the client in time (“To guarantee the best quality, I will deliver on Monday”).
- Or you outsource the editing of one of the sessions.
- You make proactive and professional decisions, not reactive and desperate ones.
3. Logical Dependencies (The Domino Effect) A session cannot be delivered if it hasn’t been edited. And it cannot be edited if it hasn’t been selected (Culled). The Gantt chart in GGyess shows you these dependencies. If you are a day late in photo selection, you see how the entire “Final Delivery” bar automatically shifts into the future. You visually understand the real impact of today’s procrastination on your weekend freedom.
4. Mental Peace to Create When you know exactly what day and time you are going to edit each photo, your mind is freed from background noise. During the photoshoot, you aren’t thinking anxiously: “I have a thousand things pending, I don’t know if I’ll make it.” You are present. You are connecting with the model. You are looking for the perfect light and the 85mm angle.
Administrative order protects your creativity.
Conclusion:
Making people look good requires technique, optics, and empathy. Getting people to recommend you and hire you again requires punctuality and reliability.
Use the right lens for beauty, and use the right chart for time. Your art and your business will thank you.