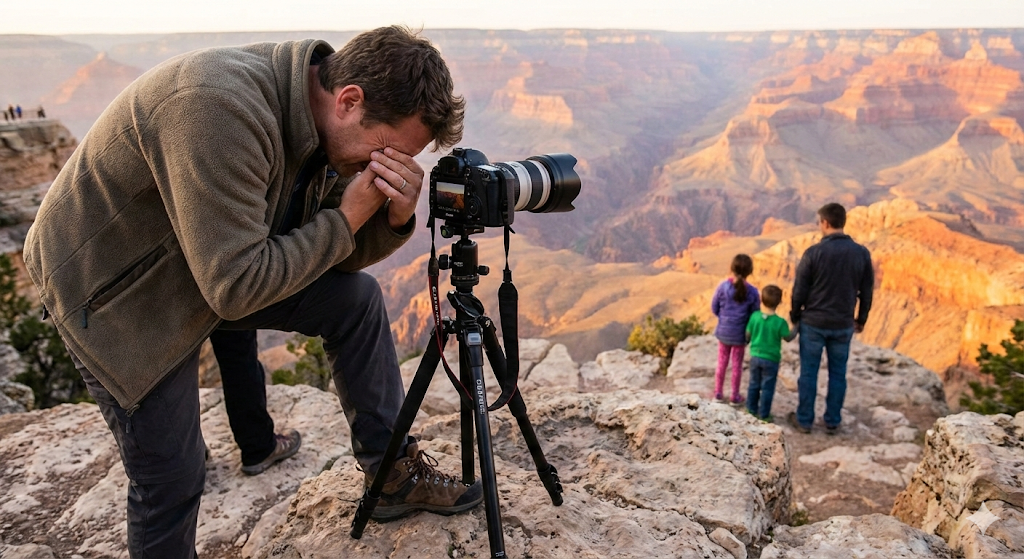
It’s happened to you. You save up all year. You ask for your two weeks of vacation. You rent an SUV, load up the family, and drive to the edge of the Grand Canyon or Yosemite Park.
You stand before the abyss. The view is so majestic, so imposing, that you think: “Even a chimp with a disposable camera could take an award-winning photo here.” It’s impossible to fail.
You mount your tripod, adjust your $3,000 camera, look through the viewfinder… and start to cry silently.
What you see on the screen has none of the soul of what your eyes are seeing. It’s flat. It’s boring. It looks nothing like that $1.25 postcard sold in the gift shop. You feel scammed. The culprit? Ansel Adams. He spoiled us with a perfection that seems unattainable.
But the reality is that landscape photography is not about “being there.” It is a rigid technical discipline. If your landscapes look like tourist snapshots, it’s because you are breaking the sacred rules.
Below, we break down the operational manual for capturing nature like a professional.
1. The Golden Rule: The Schedule of the Chosen
There is an unbreakable law in professional landscaping. You can have the best gear in the world, but if you ignore this, you will fail. You only shoot at two times:
- Sunrise: 15-30 minutes before the sun comes up and up to 30 minutes after.
- Sunset: 15-30 minutes before it goes down and 30 minutes after.
Why? Because I said so. Kelby tells an anecdote about Joe McNally, a National Geographic photographer. When someone asked him if it was really mandatory, Joe almost hit him with his tripod. Major magazine editors don’t even look at photos taken at noon. Midday light is harsh, flat, and ugly. The light at the edges (“Golden Hour” and “Blue Hour”) is soft, warm, and dimensional. If you want professional results, forget about sleeping in.
2. Stability: Marry Your Tripod
The professional landscape photographer never handholds the camera. Never. You are going to be shooting in low light (dawn/dusk) and you need closed apertures (f/22). This forces slow shutter speeds. If you shoot handheld, the photo will be blurry. You will see other tourists shooting handheld at sunrise. When they get home and open Photoshop, they will see artistic blurs, not landscapes.
The Current Trend: Carbon Fiber. They are expensive, yes. But they weigh half as much as metal ones and, most importantly, they don’t vibrate. Carbon fiber absorbs wind or ground resonance better than aluminum.
3. Combat Configuration: Aperture Priority and “Emergency Lights”
Forget Manual mode for a second. Landscapers live in Aperture Priority (Av or A). Your goal is to tell a story through depth of field:
- Want to isolate a detail? Use f/2.8 or f/4. The background melts away.
- Want total sharpness (the classic landscape)? Use f/22. Everything from the rock at your feet to the mountain 10 km away will be in focus.
The Lifesaver: “The Highlight Alert” (Blinkies) On your camera, activate the overexposure alert. When you review the photo, blown-out areas (pure white with no detail) will blink black and white.
- If the sun blinks, that’s fine (the sun is pure white).
- If the clouds blink, you have a problem. You’ve lost texture.
- Solution: Use exposure compensation. Dial down to -1/3 or -2/3 EV until the blinking stops. Protect cloud detail with your life.
4. Composition: The Three-Layer Cake
Analyze the photos of David Muench or Stephen Johnson. They all have a common architectural structure that the amateur ignores. A great landscape has three mandatory elements:
- Foreground: It doesn’t start at the sea; it starts at the sand or a rock at your feet.
- Middle Ground: The main subject (the lake, the valley).
- Background: The sky and distant mountains.
The common mistake is photographing only the middle ground and the background. Without a powerful foreground (some flowers, a log, a rock), the photo has no visual entry point. Next time, ask yourself: “Where is my foreground?”
Where do I put the horizon? Never in the center. That is boring.
- Spectacular sky? Horizon low (bottom third). Give the clouds the spotlight.
- Interesting ground? Horizon high (top third). Give the earth the spotlight.
- Ugly gray sky? Eliminate it. Raise the horizon to the max or make it disappear.
5. Mastery of Water and Forests
The Secret of “Silk” How do they get those rivers that look like mist or silk? It’s not Photoshop. It’s slow shutter speed (1 or 2 seconds). The problem is that if you do that during the day, the photo comes out white.
- Solution 1: Shoot before the sun comes up.
- Solution 2: Use a Neutral Density (ND) filter or a Polarizer. They cut the light and allow long exposures in broad daylight.
The Chaos of the Forest Forests are difficult because they are messy. Dead branches, dry leaves, chaos.
- Pro Trick: Don’t frame the ground. Cut off the base of the trees. By eliminating the messy floor, the forest becomes a series of abstract and elegant vertical columns.
- The Weather: Never photograph a forest on a sunny day (too much contrast). Forests love cloudy days or fog. Diffuse light saturates the greens.
6. The Secret Arsenal: Filters and Accessories
There are two pieces of glass that separate the children from the adults in landscaping.
1. The Polarizer (Sunglasses for your lens): This filter is magic. By rotating it:
- It eliminates reflections from water and wet rocks.
- It darkens the blue sky, making white clouds “pop.”
- It saturates foliage colors by removing specular glare.
- Note: Don’t use polarizers with super wide-angle lenses (fisheyes), or you will have uneven and strange blue skies.
2. The Graduated Neutral Density Filter (ND Grad): Imagine a filter that is dark at the top and clear at the bottom. It serves to balance exposure. The sky is always much brighter than the ground. Without this filter, you either burn the sky or leave the ground black. The ND Grad darkens only the sky, allowing the camera to capture the entire dynamic range in a single shot.
3. The Baseball Cap: Sun flare ruining the photo? Take off your cap and use it to shade the lens (without it appearing in the photo). Sometimes, low tech is the most effective.
7. Panoramas: The Art of Stitching the World
Sometimes, a single shot isn’t enough to capture the vastness. Panoramas are the solution, but they require discipline so Photoshop can stitch them together later without errors. The Panoramic Protocol:
- Tripod mandatory.
- Shoot Vertically: You get more height and less edge distortion.
- Everything in Manual: Manual focus (focus once and lock it), Manual White Balance (Cloudy), and Manual Exposure. If the camera changes light or focus between shots, the panorama will be a disaster.
- Overlap: Make sure each photo overlaps 20-25% with the previous one.
- Speed: Shoot fast if there are moving clouds.
8. Wildlife: The Rule of the Eyes
If an animal appears (or if you go looking for it), the landscape takes a backseat.
- Focus on the eyes: If the eyes aren’t sharp, the photo is useless.
- Negative space: Don’t frame the animal tight. Give it “air” in the direction it is looking or walking. Let the photo breathe.
- Cheat with distance: Animals always look further away in the photo than you see them. You need to get close. If you don’t have money for a 600mm f/4, buy a Tele-converter (1.4x or 2x). It’s a cheap magnifying glass that multiplies your focal length.
9. Weather: Your Uncomfortable Ally
Is it raining? Is it cloudy? Go out and shoot! Most photographers stay home editing. Mistake.
- Just after the storm: It is the most dramatic moment. The sky opens, the light is incredible, and the air is clean.
- Fog: It is free Hollywood atmosphere. It hides ugly backgrounds and creates layers of depth.
- Gray days: Perfect for waterfalls and flowers (saturated colors without harsh shadows). If the sky is ugly, just don’t include it in the composition.
The Hidden Lesson: Global Vision
If you review everything we just learned about landscape photography, you will realize that it is not about “point and shoot.” It is about visualization and systems.
The professional landscaper doesn’t just arrive and shoot.
- Scout: Walk without the camera. Look for angles.
- Plan: Know what time the sun rises.
- Visualize: Imagine the full panorama before taking the first photo of the segment.
- Execute: Apply filters, tripods, and methodical settings.
Success lies in having a panoramic view of the situation. You have to see how the individual pieces (light, foreground, background, weather) come together to form a coherent whole.
However, here is where the cruel irony of the professional photographer arises.
You are capable of visualizing a 12-photo vertical panorama, calculating manual exposure and overlap mentally. You are capable of seeing the full landscape. But when you get to your office, your business vision is a narrow and chaotic tunnel.
You look at your clients and only see “the one who owes me money” or “the one who wants the photos now.” You don’t have a panoramic view of your business.
- How many clients are in the “scouting” (quote) phase?
- How many are in the “shooting” (scheduled session) phase?
- How many are in “post-production”?
- How many are ready for “delivery”?
You manage your business with sticky notes or loose emails, which is the administrative equivalent of shooting handheld in a dark cave. You lose perspective. Details escape you. And in the end, the result is as depressing as a poorly exposed photo of the Grand Canyon.
You need a tool that allows you to take a step back and see the full landscape of your workflow. You need to stop looking at the tree and start seeing the forest.
It’s time to apply the panoramic mindset to your management. It’s time to discover…
Kanban for Photographers: Visualize the Status of Every Client at a Glance.
1. The “Panoramic Board” of Your Business The Kanban method (used in GGyess WorkSuite) is literally a panorama of your company. On a single screen, you see columns representing the phases of your work “river”: Request -> Quote -> Session -> Editing -> Review -> Final Delivery
2. Move the Cards, Not the Problems Each client is a visual card (with their cover photo, just like your RAW files). When you finish editing a landscape session, you don’t have to remember to send it. You simply drag the card from “Editing” to “Review.” It is a physical and visual movement that gives your brain peace, just like seeing the bubble level on your tripod perfectly centered.
3. Detect “Bottlenecks” In a landscape, if the horizon is crooked, you see it instantly. On a Kanban board, if you see 10 cards piling up in the “Editing” column and only 1 in “Delivery,” you just visually detected a problem. You know you have to stop selling and start editing. You have control.
4. The Real Scale (Proportion) Kelby taught us to put a person next to a mountain to give a sense of scale. GGyess gives you the sense of scale of your income. by seeing all your clients displayed on the board, you understand the magnitude of your month. You know if you are going to have a month “Majestic like Yosemite” or a month “Flat like Kansas.”
Conclusion:
Landscape photography teaches you patience, perspective, and the importance of having the right equipment to stabilize the shot. Your business deserves the same stability. Don’t let your clients get lost in the fog of administrative clutter.
Use a system that allows you to see the horizon clearly. Visualize, organize, and shoot.